
How to put baby to sleep
The "40-second" method isn't magic; it's a physiological reset. By combining gentle pressure with rhythmic sound, you mimic the womb environment, signaling to your baby's nervous system that it's safe to rest. This approach works best when you place your baby on their back and gently pat their chest or tummy while making a soft "shush" sound. The combination of gentle pressure and consistent audio helps regulate their breathing and heart rate, turning that built-in sleep switch on.
We selected sleep sacks and swaddles based on three concrete criteria: safety, temperature regulation, and ease of use. Since safety is non-negotiable, every item in our guide meets current AAP guidelines for safe sleep, including breathable fabrics and secure but easy-to-use closures. We also prioritized items that grow with your baby, offering versatility from newborn swaddling to toddler transition. Our testing focused on how quickly the fabric wicks moisture and how securely the zipper stays put during restless nights, ensuring you spend less time adjusting and more time resting.
40 2026 guide: How to Put a Baby to Sleep in 40 Seconds & Best Sleep Sacks for New Parents
The 45-minute intruder and fragmented sleep cycles are common hurdles for new parents, but a consistent routine can stabilize rest. This guide combines a proven 40-second soothing technique with 40 specific sleep sack recommendations to help you plan around the critical first year.
1. The 40-Second Shushing Technique Explained
This method relies on rhythmic, close-range white noise to mimic the womb’s acoustic environment. Hold the infant near your ear and exhale a steady, loud "shh" sound synchronized with their breathing cycle. The volume must be audible, not a whisper, to effectively override external disturbances and trigger a calming reflex without causing startle responses.

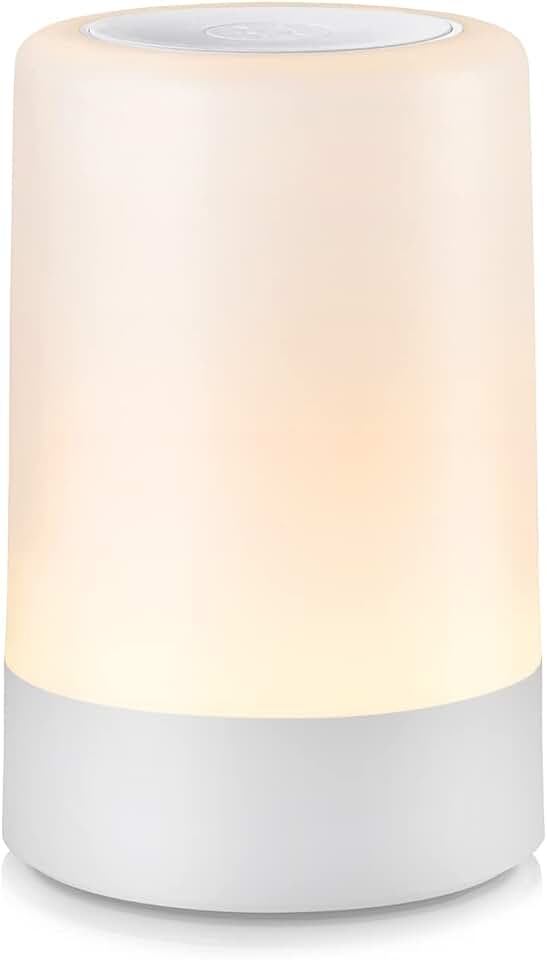
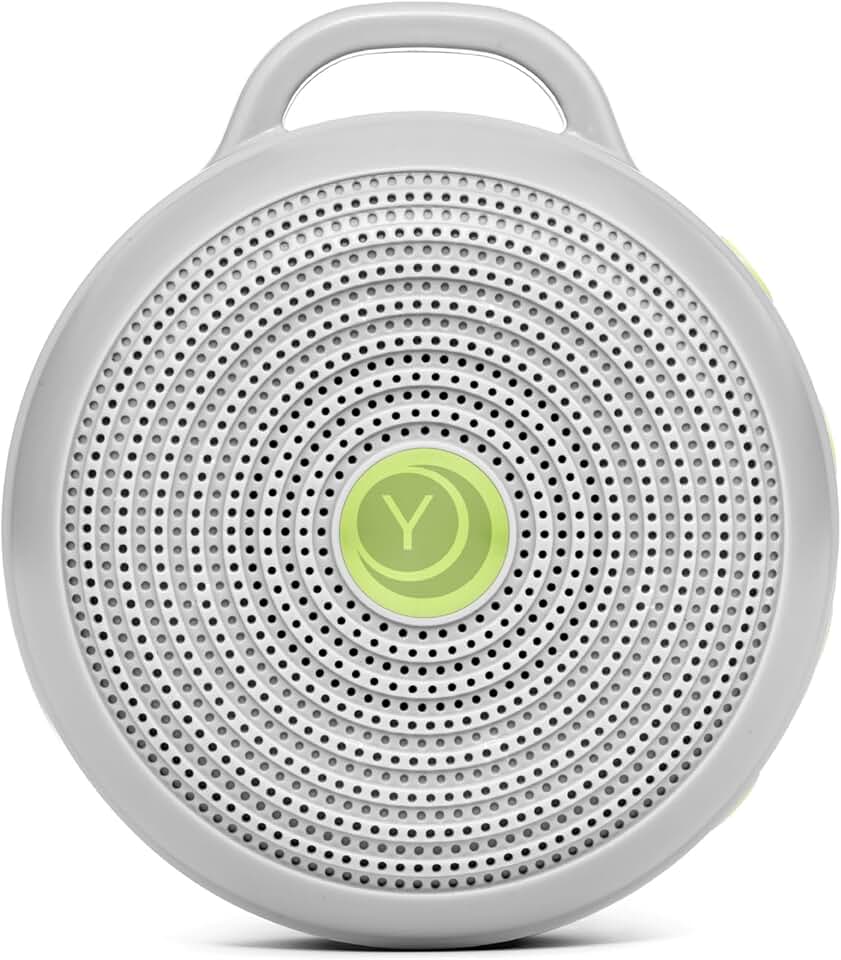
2. White Noise Machine Settings for Newborns
Optimal settings involve continuous, non-looping sound at a safe decibel level, ideally below 50 dB at three feet from the crib. Position the device away from the baby’s head to prevent hearing damage while ensuring the sound blankets the room. Choose machines with a steady pink or brown noise profile, which offers deeper frequencies than harsh white noise for better sleep continuity.

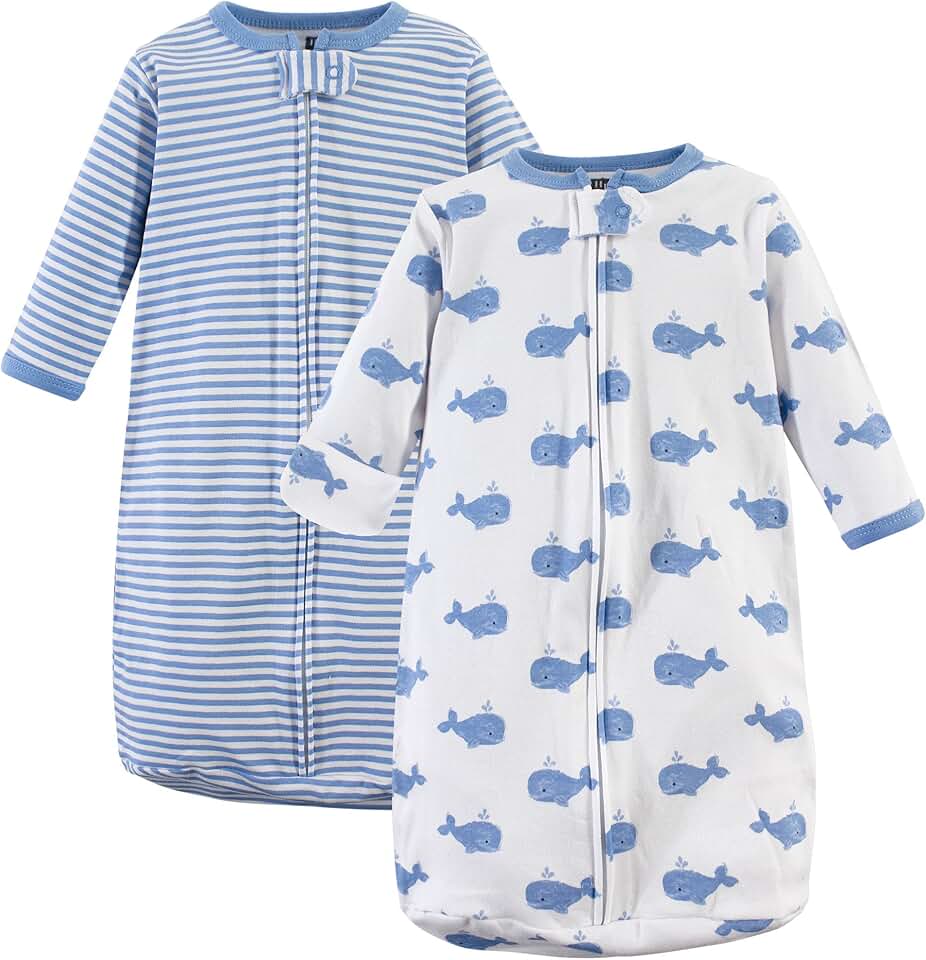
3. Swaddling Methods That Prevent Rolling Over
Proper swaddling secures the arms snugly against the torso while leaving the hips loose for healthy development. Use a square blanket folded diagonally, place the baby with shoulders aligned to the fold, and tuck one corner tightly across the chest. Ensure the wrap is firm enough to prevent arm flailing but loose enough to allow hip movement, reducing the risk of hip dysplasia.

4. Sleep Sack Zippers vs. Snaps Comparison
Zippers offer rapid nighttime changes and consistent tension, reducing the risk of gaps that let cold air in. Snaps provide a customizable fit and eliminate the potential for zipper pinching, though they require more time to secure. For newborns, zippers are generally preferred for speed, while older infants who move frequently may benefit from the adjustable nature of snap closures.

5. Wearable Blanket Weight Ratings by Season
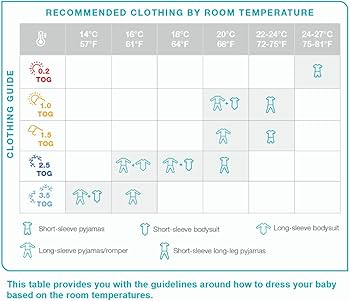
Selecting the correct TOG (Thermal Overall Grade) rating is crucial for maintaining safe sleep temperatures. A 0.5 TOG suits warm summer nights, while 1.0 TOG works for spring and autumn. Winter months typically require a 2.5 TOG rating to provide adequate insulation without overheating. Always check the room temperature and dress the baby in appropriate layers underneath the sack to prevent overheating risks.

6. TOG Value Chart for Nursery Temperatures
Matching sleep sack warmth to room temperature prevents overheating, a key SIDS risk factor. Use this TOG (Thermal Overall Grade) chart as your baseline: 0.5 TOG suits 75–80°F, while 2.5 TOG is ideal for 60–68°F. Always pair these ratings with a nursery thermometer to ensure the environment stays within the safe 68–72°F range recommended by pediatric sleep experts.
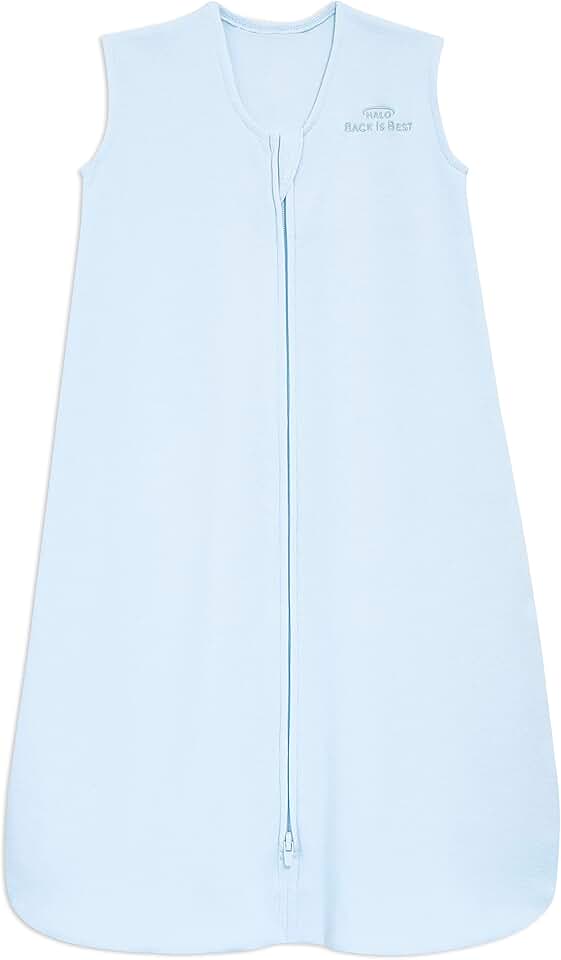
7. Safe Sleep Positioning with Sleep Sacks
Once babies show signs of rolling, typically around four months, swaddling must stop to prevent suffocation risks. Transition to a wearable blanket that allows free arm movement while keeping legs loose for hip development. Ensure the sack fits snugly around the chest but leaves ample room at the bottom. This positioning supports safe back-sleeping without restricting natural movement or increasing the risk of SIDS.

8. Transitioning from Swaddle to Sleep Sack
Moving from a swaddle to a sleep sack can disrupt sleep initially due to the Moro reflex. Start by leaving one arm out for a few nights, then both arms, allowing the baby to adjust gradually. Choose a sack with a slightly snugger chest fit to mimic the swaddle’s security without restricting movement. This stepwise approach minimizes sleep regressions and helps infants feel secure as they gain motor skills.

9. Best Organic Cotton Sleep Sacks for Eczema
Babies with eczema benefit from breathable, organic cotton sleep sacks that reduce skin irritation and retain moisture. Look for GOTS-certified fabrics that are free from harsh chemicals and dyes. The soft, natural fibers help regulate temperature while minimizing friction against sensitive skin. Pairing these sacks with a hypoallergenic laundry detergent ensures that irritants are minimized, promoting better sleep and healthier skin for eczema-prone infants.

10. Breathable Mesh Panels for Hot Sleepers
For babies who run hot or live in warm climates, sleep sacks with breathable mesh panels offer essential ventilation. These designs help dissipate excess heat, reducing the risk of overheating while maintaining a cozy feel. Look for sacks with mesh back panels or side vents that allow air circulation without compromising safety standards. This feature is particularly useful during summer months or in consistently warm nurseries, ensuring comfort throughout the night.

11. Two-Way Zipper Access for Night Diapers
Midnight diaper changes become significantly less stressful when the zipper runs the full length of the garment. A two-way zipper allows parents to unzip from the bottom while keeping the upper body securely covered, minimizing light exposure and temperature drops. This design feature preserves the baby’s sleep cycle by reducing the need to fully undress or remove the sleep sack entirely during quick nighttime maintenance routines.

12. Armhole Fit Guide to Prevent Squeezing
Proper armhole sizing is critical for comfort and preventing skin irritation or restricted circulation. The armholes should be snug enough to prevent the baby’s arms from slipping inside the sack, which can cause overheating, but loose enough to allow free movement. Parents should check that two fingers fit comfortably between the fabric and the baby’s armpit to ensure a safe, non-constricting fit that supports natural arm positioning.

13. Neckline Safety Standards for Infant Sleepwear
Infant sleepwear must adhere to strict neckline safety standards to prevent choking hazards and ensure proper fit. The neckline should be tight enough to prevent the garment from sliding over the baby’s head, which could obstruct breathing, but not so tight as to cause discomfort or mark the skin. Parents should verify that the sleep sack meets federal flammability and safety regulations, ensuring the neck opening is secure and appropriately sized for the infant’s age.
14. Machine Washable Sleep Sacks Durability Test
Durability is a key factor in choosing a sleep sack, especially for frequent washing. Parents should look for sleep sacks that maintain their shape, softness, and zipper functionality after multiple machine wash cycles. High-quality fabrics resist pilling and fading, ensuring the garment remains safe and comfortable over time. Checking care labels for washing instructions and reading reviews on longevity can help identify sleep sacks that withstand the rigors of daily use.
15. Hooded vs. Non-Hooded Sleep Sack Debate
The choice between hooded and non-hooded sleep sacks depends on personal preference and safety guidelines. Non-hooded sleep sacks are generally recommended for sleep as hoods can pose a suffocation risk if they shift over the baby’s face. However, hooded options may be preferred for brief periods of wear outside the crib. Parents should prioritize non-hooded designs for nighttime sleep to ensure maximum safety and compliance with safe sleep recommendations.
16. Footed vs. Footless Sack Preferences
Footed sacks keep toes warm in chilly rooms, while footless designs allow babies to wiggle legs freely, aiding motor development and temperature regulation. Choose footless if your infant kicks often or sleeps in a warmer nursery, ensuring their feet don’t overheat. Footed options provide consistent warmth for cooler climates without the risk of loose blankets. This choice depends largely on your home’s ambient temperature and your baby’s movement style.

17. Sleep Sack Sizing Charts by Weight
Weight, not age, dictates sleep sack sizing. Most brands provide weight ranges in pounds or kilograms on their sizing charts. A sack that is too large poses a suffocation risk as it may cover the face, while one that is too small restricts hip movement and breathing. Always measure your baby’s current weight and consult the specific manufacturer’s chart before purchasing to ensure a snug, safe fit that allows for proper leg development.

18. Co-Sleeping Safe Sleep Sack Guidelines
Safe sleep guidelines generally recommend a firm, flat surface separate from parents for infants under one year. If co-sleeping, ensure the sleep sack is thin, fitted, and free of loose fabric to prevent entrapment. Avoid adult bedding, pillows, or soft mattresses that can shift and cover the baby’s face. The American Academy of Pediatrics advises against bed-sharing for infants under four months due to heightened SIDS risks, emphasizing separate sleep surfaces.

19. Crib Safety Clearances for Bulky Sacks
Bulky sleep sacks can reduce the effective clearance space in a crib, potentially allowing a baby to slide under the mattress or become trapped between the mattress and crib side. Ensure the mattress fits tightly with no gaps larger than two fingers. Avoid overly thick, down-like sacks in cribs with older slat designs. Regularly check that the baby remains on their back and that the sack does not ride up over the chest or face during sleep.

20. The 5 S's Method Step by Step
Dr. Harvey Karp’s 5 S’s method soothes newborns by mimicking the womb: Swaddle, Side/Stomach position (while awake), Shush, Swing, and Suck. Swaddle snugly to prevent startle reflexes. Hold the baby on their side or stomach only while soothing, never for sleep. Use loud shushing sounds near the ear. Rhythmically swing or jiggling the head gently. Offer a pacifier or finger to suck. This sequence can calm crying infants quickly, aiding the transition to sleep.

21. Pacifier Introduction Timing for Sleep Training
Timing matters more than the brand. Introduce pacifiers before the four-month sleep regression hits, as older babies may reject them entirely. For breastfed infants, wait until nursing is well-established to avoid nipple confusion. Use it as a soothing tool during the 40-second shush, not as a permanent crutch. This strategic introduction helps babies self-soothe without creating a dependency that requires constant parental intervention during night wakings.

22. Dream Feed Timing to Extend Sleep
A dream feed involves gently feeding your baby while they are still asleep, typically around 10 or 11 PM. This strategy tops off their stomach before your longest stretch of sleep, potentially extending that period by an hour or two. It works best for babies who wake frequently due to hunger rather than comfort. Ensure the baby remains drowsy but not fully awake to maintain the sleep association and encourage them to settle back down quickly.

23. Bedtime Routine Consistency Checklist
Consistency signals safety to your infant’s developing circadian rhythm. Create a predictable sequence: bath, massage, pajamas, book, and bed. Each step should take roughly five minutes, keeping the total routine under thirty minutes. Avoid overstimulating activities like rough play or bright lights. The key is repetition; performing the same actions in the same order every night helps your baby anticipate sleep, reducing resistance and making the transition to sleep sack time smoother and less stressful for everyone involved.
24. Crying It Out vs. Gradual Extinction
The choice between Ferber-style graduated extinction and full extinction depends on parental comfort and baby temperament. Graduated extinction involves checking on your baby at increasing intervals, offering brief reassurance without picking them up. Full extinction means letting the baby self-soothe without intervention. Both methods aim to teach independent sleep skills. Research suggests both can be effective, but gradual extinction often feels less harsh for parents. Choose the approach that aligns with your family’s values and consistency.

25. Handling Night Wakings Without Full Wake
When your baby wakes at night, resist the urge to turn on lights or engage in play. Use low-light conditions and minimal interaction. Offer a pacifier or gentle patting to soothe them back to sleep without fully rousing them. This technique, often called the "pause," allows babies to reconnect sleep cycles independently. If they continue to cry, check for physical discomfort like a wet diaper or temperature issues, but keep the environment calm and boring to encourage a return to sleep quickly.
26. Daytime Nap Scheduling for Night Sleep
Aligning daytime wake windows with circadian rhythms prevents evening resistance. Use a nap tracker to monitor tired cues, ensuring the final nap ends early enough for adequate sleep pressure to build. Consistent timing stabilizes melatonin production, making the bedtime transition smoother and reducing the likelihood of overtiredness before the 40-second sleep induction begins.

27. Overtired Baby Signs and Fixes
An overtired baby releases cortisol, making sleep elusive despite exhaustion. Watch for clenched fists, arched backs, and frantic rubbing of eyes or ears. The fix involves immediate calm: dim lights, reduce stimulation, and use gentle rocking or shushing to lower arousal levels before attempting to lay the baby down, preventing a cycle of crying that delays sleep onset.

28. Undertired Baby Signs and Fixes
If a baby fights sleep with wide eyes and playful behavior, they may simply be undertired. Check the time since their last nap; if it is less than the recommended age-based wake window, resist forcing sleep. Instead, engage in quiet, low-stimulation activities like reading or gentle massage to help them wind down naturally without creating negative sleep associations.
![Johnson's Baby Oil, Pure Mineral Oil to help Prevent Moisture Loss for Baby, Kids & Adults, Gentle & Soothing Baby Massage Oil for Dry Skin Relief, Original Scent, Baby Essentials, 20 fl. oz [Amazon-developed Certification] Compact by Design](https://m.media-amazon.com/images/I/71N2ftMvKNL._AC_UL960_QL65_.jpg)
29. Sleep Regression at Four Months
The four-month regression marks a permanent shift to adult-like sleep cycles, causing frequent wakings. This is not a setback but a developmental milestone. Maintain consistent bedtime routines and sleep environment cues. Avoid introducing new sleep props like rocking or feeding to sleep, as this can create dependencies that complicate self-soothing during this transitional phase of neurological maturation.

30. Sleep Regression at Eight Months
Separation anxiety peaks around eight months, leading to nighttime protests when parents leave the room. Acknowledge the fear with brief reassurance but keep interactions boring and brief. Practice short separations during the day to build confidence. Consistency is key; responding immediately every time can reinforce the anxiety, while steady, calm boundaries help the baby learn they are safe alone.

31. Sleep Regression at Twelve Months
Around their first birthday, babies often face a developmental leap that disrupts sleep patterns. Motor skills like standing and walking, combined with growing independence, can cause nighttime resistance. Maintaining a consistent bedtime routine helps anchor them, while offering limited choices during the day empowers their autonomy. This approach reduces power struggles and supports smoother transitions back to regular sleep cycles.
32. Travel Sleep Strategies for New Parents
Traveling with an infant requires adapting familiar sleep cues to unfamiliar environments. Bring portable white noise machines and their favorite loveys to create a recognizable sleep sanctuary. Keep naptimes aligned with the destination’s schedule as closely as possible, even if it means starting earlier. These small adjustments help minimize jet lag effects and ensure restful nights for both parents and babies during trips.
33. Daylight Exposure to Regulate Circadian Rhythm
Morning sunlight plays a critical role in setting your baby’s internal clock. Exposure to natural light within the first hour of waking helps suppress melatonin production, signaling that daytime has begun. This simple habit strengthens the distinction between day and night, making it easier for infants to fall asleep at night and wake up refreshed in the morning without excessive fussiness.

34. Blackout Curtains Effectiveness for Day Naps
High-quality blackout curtains are essential for creating a sleep-conducive environment during daytime naps. They block external light that can interfere with melatonin production, helping babies stay asleep longer. Look for curtains with side channels or magnetic seals to eliminate light gaps. This investment significantly improves nap duration and quality, ensuring your baby gets the rest needed for healthy development.

35. Room Temperature Ideal Range for Infants
Maintaining a nursery temperature between 68°F and 72°F (20°C to 22°C) is optimal for infant sleep. Too warm increases SIDS risk, while too cold causes discomfort and frequent waking. Use a reliable room thermometer to monitor conditions accurately. Dress your baby in layers appropriate for the temperature, allowing easy adjustments throughout the night to ensure they remain comfortable and safe.

36. Humidity Levels for Comfortable Breathing
Dry air irritates nasal passages, causing congestion that disrupts sleep. Aim for 40-60% relative humidity to keep mucous membranes moist. Use a hygrometer to monitor levels, as standard room thermometers often lack this data. Too much moisture encourages mold, while too little causes static and dry skin. Adjusting humidity helps babies breathe easier through the night.

37. Noise Level Decibel Limits for Nurseries
White noise should mask sudden household sounds without overwhelming delicate ears. Keep volume below 50 decibels, roughly equivalent to a quiet conversation. Place the machine at least seven feet from the crib to prevent direct sound exposure. Consistent, low-level background noise helps soothe babies by simulating the womb’s acoustic environment, promoting deeper rest.

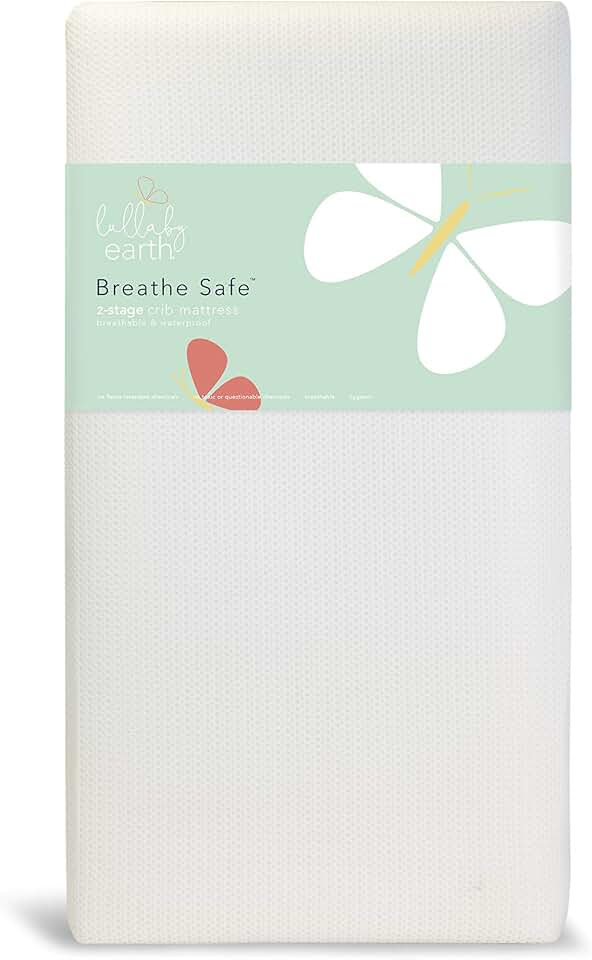
38. Mattress Firmness Standards for Safe Sleep
A firm mattress prevents suffocation risks by keeping the baby’s airway open. Press your thumb into the surface; it should not leave an indent. Soft mattresses conform to the face, increasing SIDS risk. Choose a tight-fitting sheet designed specifically for infant cribs to avoid gaps. Firmness ensures proper spinal alignment while maintaining safety standards.
39. Bedding Restrictions in Infant Cribs
Safe sleep guidelines strictly prohibit loose blankets, pillows, and bumpers in cribs. These items pose suffocation and entrapment hazards for infants who cannot yet move them away from their faces. Use a fitted sheet only, secured tightly over the mattress. If warmth is needed, opt for a wearable sleep sack instead of traditional bedding to ensure unrestricted breathing.

40. Sleep Training Readiness Signs by Age
Most babies are developmentally ready for gentle sleep training between four and six months. Look for signs like self-soothing abilities, consistent weight gain, and the ability to fall asleep independently. Before starting, ensure no medical issues or recent disruptions affect their routine. Patience and consistency are key during this transition phase for long-term success.
Pick the right fit
Choosing a sleep sack isn't just about warmth; it's about safety and mobility. The right fit prevents overheating and allows your baby to move naturally as they learn to self-soothe. An ill-fitting sack can restrict hip development or ride up over the face, creating a hazard. Use this simple framework to plan around the options.

The tog rating measures thermal insulation. Match the tog to your room temperature. For rooms between 20-22°C (68-72°F), a 1.0 tog is usually sufficient. Cooler rooms may require 2.5 tog, while warmer environments need a lighter 0.5 tog or just a onesie. Overdressing is a common cause of night wakings.

Weight is the primary guide for sizing, but chest circumference is the critical check. The neck hole should sit snugly against the armpits without gaping. If you can fit more than two fingers between the neck and the fabric, the sack is too loose and may ride up over the baby's face during sleep.
Look for a wide, tapered bottom that allows legs to bend naturally. This design supports healthy hip development and lets babies wiggle into comfortable positions. Avoid sacks with rigid or narrow bottoms that force legs straight, which can cause discomfort and disrupt sleep cycles.


As an Amazon Associate, we may earn from qualifying purchases.
| Material | Best For | Tog Range |
|---|---|---|
| Cotton | Warm rooms, sensitive skin | 0.5 - 1.0 |
| Microfleece | Cold rooms, winter | 2.5 - 3.5 |
| Bamboo | Hot sleepers, eco-conscious | 1.0 - 2.5 |
Frequently asked: what to check next
How to fix the 45 minute intruder?
The "45-minute intruder" happens because a baby’s sleep cycle is roughly 45 minutes long. When they wake after one cycle, they lack the self-soothing skills to fall back asleep. The fix is to ensure they are fully fed before the nap; a growth spurt often increases hunger, causing early waking. If they wake after 45 minutes, try feeding them first, then lay them back down for a nap with a full tummy. This helps bridge the gap between sleep cycles.
Does the 40-second method actually work for newborns?
The 40-second technique relies on mimicking the womb through pressure and sound. It works best when your baby is in the early drowsy stage, not fully asleep yet. Place your baby on their back and gently pat their chest or tummy while making a soft "shush" sound. The combination of gentle pressure and white noise can calm their nervous system quickly. However, it is not a magic switch; consistency and timing matter more than the seconds it takes.
Can I use a sleep sack with the 40-second method?
Yes. A sleep sack provides a safe, swaddle-like feel that many babies find comforting. When using the 40-second technique, ensure the sleep sack is appropriate for your baby’s age and mobility. For infants who cannot roll, a swaddle-style sack helps startle reflexes from waking them. For older babies who roll, a wearable blanket allows freedom of movement while maintaining warmth. The key is keeping the environment consistent so the baby associates the sack with sleep.
What if my baby won’t sleep in 40 seconds?
If the 40-second method fails, do not panic. Babies have varying temperaments and sleep needs. Focus on sleepy cues like yawning or rubbing eyes rather than the clock. A predictable routine is more effective than a single trick. Walk your baby gently for a few minutes, sit still, then lay them down. If they are overtired, it will take longer to settle. Patience and a calm demeanor help signal safety to your baby.
No comments yet. Be the first to share your thoughts!