
The shift from bassinet to crib
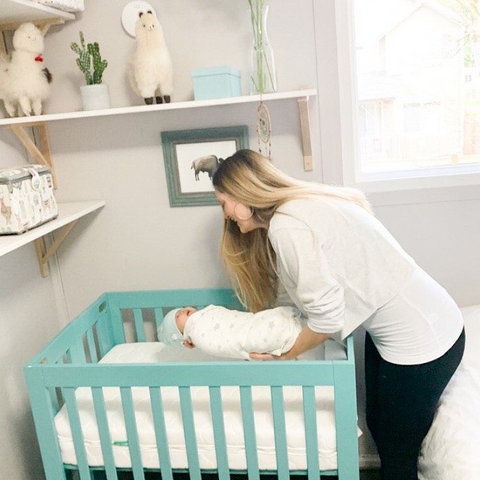
The move from bassinet to crib is a milestone many parents both anticipate and dread. It's completely normal to feel anxious about this transition; you’ve likely spent the first few months enjoying the closeness a bassinet provides, and the idea of your baby in a larger space can be unsettling. It’s also a big change for your little one who is used to the snug, and sometimes gently rocking, environment of their bassinet.
A lot of the struggle comes down to the difference in environment. A bassinet feels secure and contained, while a crib can seem vast and empty. Often, this transition coincides with a developmental leap – maybe your baby is starting to roll, or experiencing a growth spurt – which can further disrupt sleep. These changes can all happen at once, making it feel overwhelming for everyone.
The crib is the safest spot for sleep once your baby starts moving. The CDC recommends a firm, flat surface without loose bedding to keep things safe. While the bassinet worked for those first few months, the crib gives them the room they need to grow. It’s a big change, but it's the right move for their safety.
Watch for signs of readiness
Choosing the right time to make the crib transition can significantly impact its success. Avoid starting during periods of illness, travel, or other major disruptions to your baby’s routine. A sick or unsettled baby is far less likely to adapt to a new sleep environment.
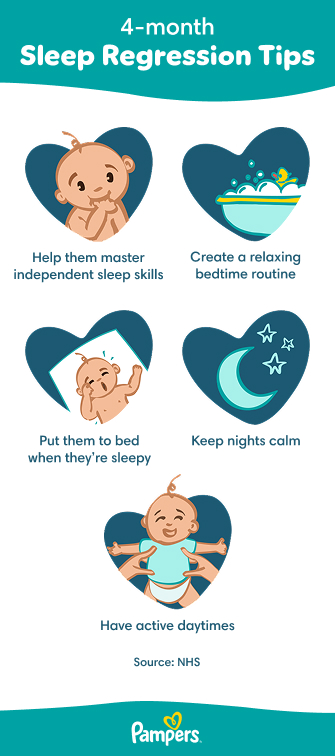
Generally, 4-6 months is often considered a good window for this transition, but there’s no hard and fast rule. Every baby develops at their own pace. Look for signs of readiness, such as consistently rolling over, showing less need for constant soothing to fall asleep, and sleeping for longer stretches at a time. These indicate increasing independence and self-soothing abilities.
One common mistake parents make is waiting too long. The longer your baby stays in the bassinet, the more accustomed they become to it, and the harder it can be to move them. If your baby is starting to outgrow the bassinet – physically or developmentally – it's a good indication it’s time to start thinking about the crib. Don't feel guilty about making the switch; it's a natural progression.
Setting up the space
Making the crib inviting is key to a smooth transition. Prioritize a safe sleep environment above all else. This means a firm mattress, a fitted sheet, and absolutely no loose blankets, pillows, or toys inside the crib – these are all recommendations from the CDC to minimize SIDS risk. Keep it simple and safe.
Start with gradual familiarization. Don’t just suddenly put your baby in the crib for bedtime. Begin by letting them spend awake time in the crib during the day. This could be for playtime, reading a book, or even diaper changes. The goal is to help them associate the crib with positive experiences, not just sleep.
I've found that sleep sacks make this easier. They keep the baby warm without the risk of loose blankets. Kyte makes a bamboo version that is very soft, and Dreamland has a weighted option that some parents swear by for calming wiggly babies. Using the same sack they wore in the bassinet helps the crib feel less foreign.
Consider the room environment, too. Maintaining a consistent room temperature and using a white noise machine can also contribute to a calming atmosphere. A darkened room can also signal to your baby that it’s time to sleep.
- Use a firm mattress with a tight fitted sheet.
- Fitted sheet
- Keep the space empty—no pillows, toys, or bumpers.
Start with naps
Don’t jump straight to nighttime sleep in the crib! Naps are a much lower-pressure starting point. Begin by offering just one nap a day in the crib. This allows your baby to adjust to the new space without the added stress of being fully tired.
If your baby protests, offer comfort, but avoid immediately picking them up. Try patting, shushing, or gentle rocking in the crib. The goal is to help them self-soothe in their new sleep space. If they escalate, then of course, pick them up, but try to minimize the amount of time they spend outside the crib.
Gradually increase the number of naps in the crib over the course of a week or two. As your baby gets more comfortable, you can start offering two, then three naps in the crib. This builds confidence for both baby and you. It's a process, and there will likely be some resistance, but consistency is key.
Common nap transition issues include short naps and frequent wake-ups. If your baby is only napping for 20-30 minutes, try extending the nap by gently shushing or patting them back to sleep. For frequent wake-ups, ensure the room is dark and quiet, and consider using a white noise machine.
Pick a nighttime strategy
Once your baby is consistently napping in the crib, you can start the nighttime transition. There are several different methods you can choose from, and what works best will depend on your baby’s temperament and your parenting style. There’s truly no one-size-fits-all answer.
Some popular methods include the Ferber method (graduated extinction, involving check-ins at increasing intervals), the chair method (sitting in the room with your baby and gradually moving further away), and gentler/no-cry methods (offering more comfort and reassurance). Resources like HeySleepyBaby.com provide detailed explanations of each method.
Regardless of the method you choose, consistency is absolutely crucial. Once you start, stick with it for at least a week to give your baby a chance to adjust. Switching methods mid-stream will only confuse them. It's a tough week, but it’s worth it to establish a sustainable sleep routine.
Expect some crying. It’s a normal part of the process, and it doesn’t necessarily mean the method isn’t working. Offer reassurance, but avoid giving in completely. A little crying is okay, and it doesn't mean you're failing your baby. Remember, the goal is to help them learn to self-soothe.
Is Your Baby Ready for the Crib? A Crib Transition Readiness Quiz
Transitioning your baby from a bassinet or co-sleeper to their crib can feel daunting! This quick quiz will help you assess your baby's readiness and your comfort level, guiding you towards the best approach for a smoother crib transition. Understanding these factors will set you up for success, following the 5 proven steps outlined in our 'Crib Transition Made Easy' guide.
Handling setbacks
Setbacks are normal! Your baby may suddenly refuse the crib after a few successful nights, or night wakings may increase. Don’t panic – this doesn’t mean you have to start over. Reiterate the importance of consistency; go back to basics and reinforce the routine.
Consider whether there are any underlying issues contributing to the setback. Is your baby teething? Experiencing a growth spurt? Feeling unwell? Addressing these issues can often resolve the sleep disruption. Sometimes, a simple adjustment to the bedtime routine is all that’s needed.
If your baby starts climbing out of the crib (usually around 18-24 months), it's time to lower the mattress or transition to a toddler bed. Safety is paramount, so address this immediately. If you’re feeling overwhelmed or the situation isn’t improving after a reasonable amount of time, don’t hesitate to seek professional help from a sleep consultant or your pediatrician.
Sleep Sack Features: A Comparison
| Material | TOG Rating Range | Ease of Use | Price Range | Key Features |
|---|---|---|---|---|
| Kyte BABY Sleep Bag | 0.5 - 1.0 TOG | Double Zipper (bottom-up for easy diaper changes) | Moderate to High | Made from incredibly soft bamboo rayon; known for breathability and comfort. Wide range of sizes and patterns. |
| Dreamland Baby Sleep Sack | 0.5 - 2.5 TOG | Zipper with protective flap | Moderate to High | Weighted design intended to promote calmness and longer sleep (consult pediatrician before use); available in various weights and TOGs. |
| HALO Sleepsack Swaddle | 2.5 TOG (Swaddle version) | Snap closures (for swaddling), Zipper (wearable blanket version) | Moderate | Offers both swaddle and wearable blanket options. Designed with arm options – arms in, arms out, or arms up. Widely available. |
| Kyte BABY Sleep Bag (Footed) | 0.5 - 1.0 TOG | Double Zipper | Moderate to High | Similar bamboo rayon material as the standard Kyte bag, but with foot openings for more mobility. Good for babies transitioning out of swaddles. |
| Dreamland Baby Sleep Sack (Graduated Weight) | 0.5 - 2.5 TOG | Zipper with protective flap | High | Features a graduated weight system, allowing you to reduce the weight as your baby grows. Designed to help babies feel secure. |
| HALO Sleepsack Essentials | 1.0 TOG | Zipper | Moderate | A simpler, more affordable version of the HALO Sleepsack, focusing on basic wearable blanket functionality. |
| Kyte BABY Sleep Bag - Cotton | 0.5 - 1.0 TOG | Double Zipper | Moderate | Made from 100% cotton, offering a different texture and feel compared to the bamboo rayon. Good for warmer climates or babies with sensitive skin. |
Illustrative comparison based on the article research brief. Verify current pricing, limits, and product details in the official docs before relying on it.


No comments yet. Be the first to share your thoughts!